Oreo Icebox Cake

Oreo Icebox Cake is a dessert that requires little effort but delivers maximum flavor. This no-bake cake combines layers of creamy whipped filling with crunchy Oreo cookies, creating a delightful treat that signifies the perfect balance of texture. With each bite, the smooth whipped cream mixture melts beautifully against the slightly softened Oreo layers, offering a taste of sweet nostalgia that many of us associate with childhood gatherings and family get-togethers.
Table of Contents
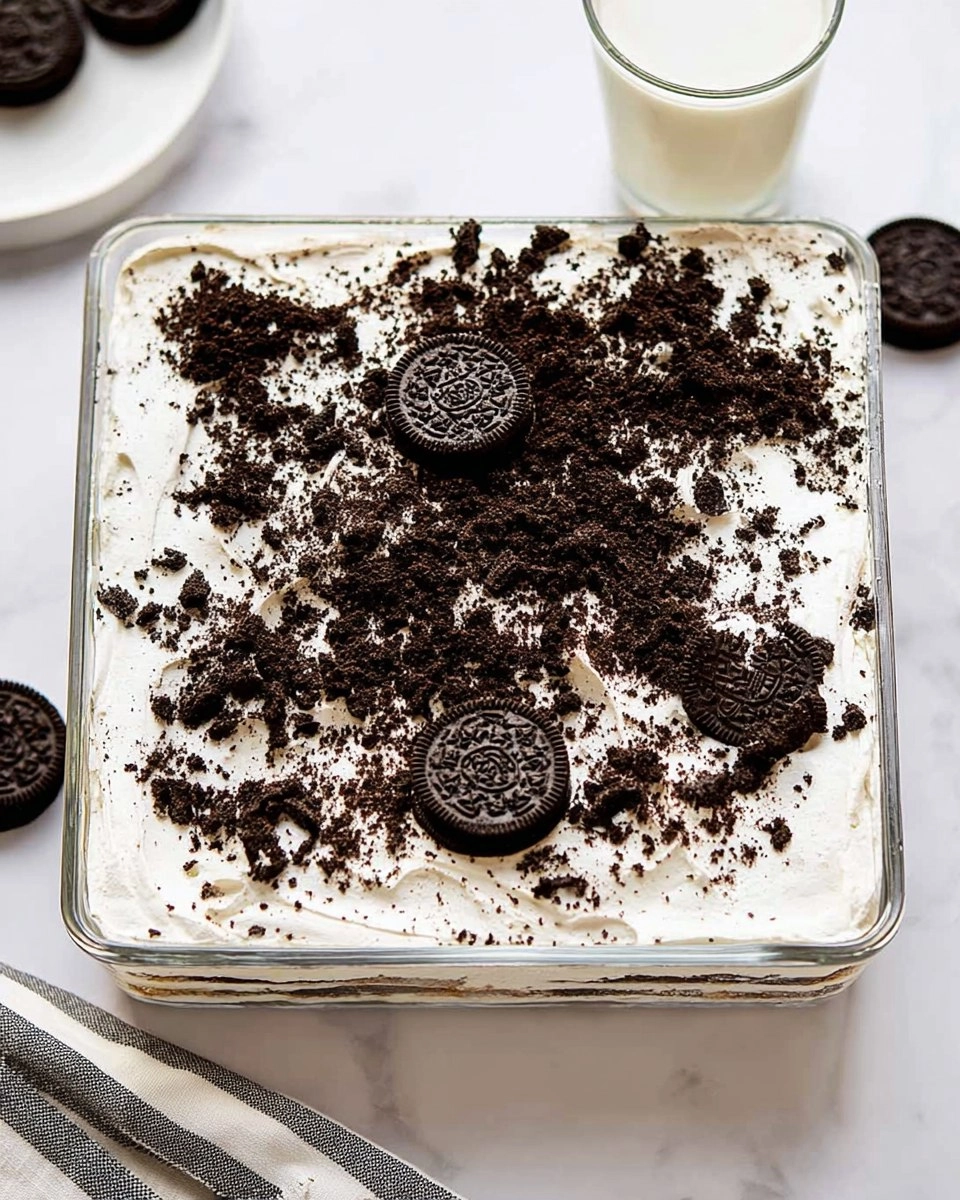
I first stumbled upon Oreo Icebox Cake during a summer barbecue, where someone brought it as a crowd-pleaser. I was instantly hooked! The ease of preparation and the joy it brought to the table made me realize that this was going to become a staple in my dessert repertoire. Whether it’s for a casual family dinner or a big birthday celebration, this delectable cake never fails to impress and satisfy cravings. Each time I serve it, I can’t help but smile, remembering those cherished moments.
Why You’ll Love This Recipe
- Simple & Quick: This dessert comes together in minimal time, allowing you to whip it up in about 20 minutes, making it perfect for last-minute gatherings.
- Irresistible Flavor: The combination of creamy filling and crunchy Oreos creates a taste sensation that’s both nostalgic and indulgent.
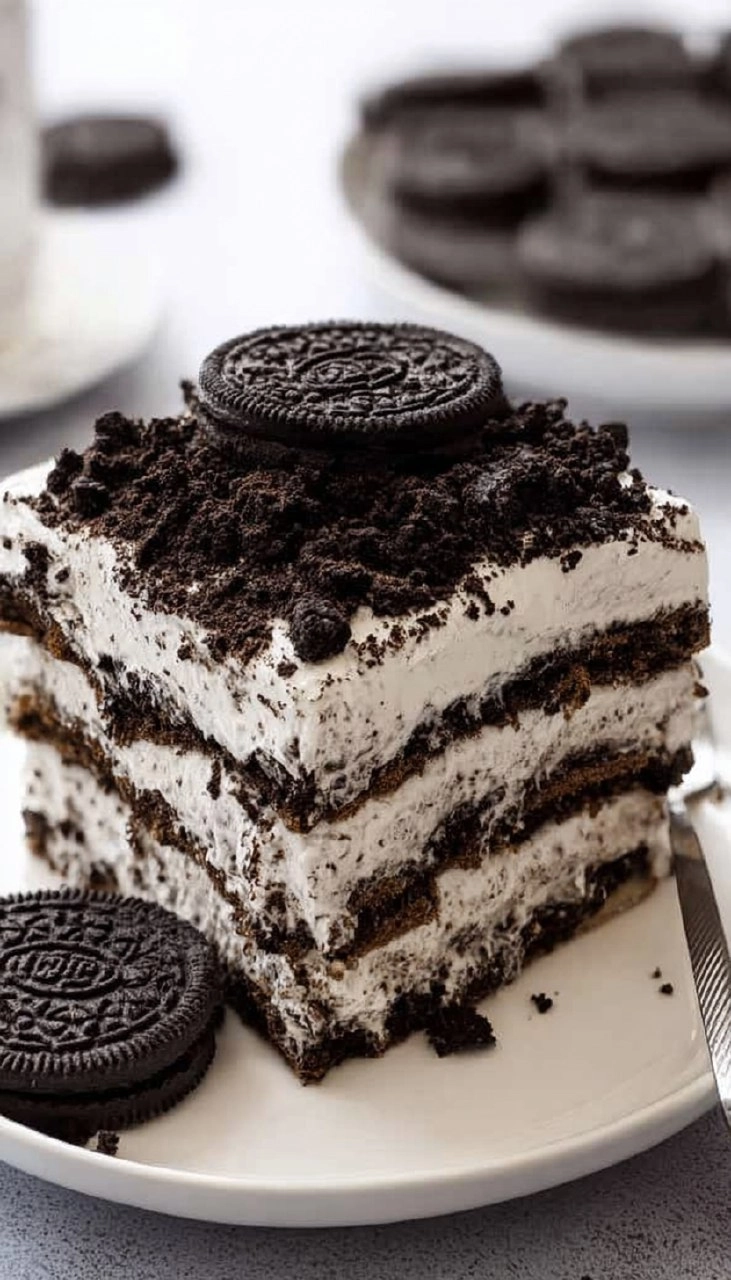
- Eye-Catching Appeal: With its layers of black and white and a sprinkle of crushed Oreos on top, this cake is visually striking and perfect for any occasion.
- Flexible Serving: Enjoy it as a sweet snack, a show-stopping dessert at parties, or even a treat for breakfast (who’s judging?).
- Diet-Friendly Options: Easy to adapt for gluten-free diets with gluten-free Oreo cookies.
Ingredients You’ll Need
- 48 Oreo cookies: These iconic cookies form the base and layered structure of the cake, providing that classic chocolatey flavor. If you prefer, you can use gluten-free Oreos as a substitute.
- 4 ounces cream cheese, softened: Adds a rich and tangy depth to the whipped cream. Be sure it’s at room temperature for easy blending to achieve that smooth consistency.
- 2 ½ cups (595 g) heavy whipping cream, cold: This is critical for achieving the light, fluffy texture of the whipped mixture. Make sure it’s cold to create stable peaks.
- ½ cup (62.5 g) confectioners’ sugar: Adds sweetness to the whipped cream. You can adjust the sugar to taste or use a sugar alternative if desired.
- 1 teaspoon vanilla extract: A splash of pure vanilla enhances the overall flavor profile. Anything synthetic can alter the cake’s taste, so stick with the real deal.
- Crushed Oreo cookies: This is used for garnishing the top layer, adding both texture and a delightful finish.
How to Make Oreo Icebox Cake
- Chill Your Equipment: Place the bowl of a stand mixer and its whisk attachment in the freezer for 15 to 20 minutes to chill. This step ensures that your cream can froth perfectly.
- Make The Whipped Cream Mixture: In the chilled bowl, beat the 4 ounces of softened cream cheese until smooth. Add in 2 ½ cups of cold heavy whipping cream, ½ cup of confectioners’ sugar, and 1 teaspoon of vanilla extract. Beat on medium-high speed until stiff peaks form—just be cautious not to overbeat and let it turn grainy.
- Layer the Base with Cream: Spread a thin layer of the whipped cream mixture into the bottom of an 8×8-inch baking dish. This forms a lovely base for your Oreos.
- Add Oreo Cookies: Arrange a single layer of 48 Oreo cookies over the whipped cream mixture, breaking a few cookies as necessary to create an even layer.
- Layer Again with Cream: Spread about one-third of the remaining whipped cream mixture evenly over the cookies. It’s all about those delicious layers!
- Repeat the Process: Follow this layering process two more times, making sure to end with a final layer of whipped cream on top.
- Garnish with Crushed Oreos: Sprinkle the top of the cake with crushed Oreo cookies to add a decorative touch and extra crunch.
- Chill-Out Time: Cover the dish tightly and refrigerate for at least 6 to 8 hours, or preferably overnight. This resting period allows those Oreo cookies to soften beautifully, creating a cake-like texture.
- Serve Cold: When ready to serve, for the cleanest slices, place the cake in the freezer for 20 to 30 minutes before cutting. Then, slice and enjoy!
Storing & Reheating
To store your Oreo Icebox Cake, keep it tightly covered in the refrigerator for up to 5 days. If you want to freeze any leftovers, wrap it securely in plastic wrap and then foil; it can last up to 3 months in the freezer. To refresh its texture, simply let it thaw overnight in the refrigerator before serving, and it’ll taste just as delightful as the day you made it!
Chef’s Helpful Tips
- Avoid Overbeating: When whipping cream, stop as soon as stiff peaks form to prevent a grainy texture. Aim for that perfect silky feel!
- Room Temperature Cream Cheese: Make sure the cream cheese is softened; this ensures a lump-free consistency in your whipped mixture.
- Layering Evenly: Be sure to spread each layer evenly for a balanced cake and beautiful presentation.
- Experiment with Flavors: Feel free to add a touch of almond extract or other flavorings if you’re feeling adventurous.
- Make-Ahead Wonder: This icebox cake is perfect for making ahead of time, allowing the flavors to meld while you focus on other preparations.
Oreo Icebox Cake captures the essence of a comforting dessert that’s both simple and satisfying. Its delightful combination of creamy and crunchy textures makes it irresistible, while the ease of preparation makes it a perfect choice for any gathering. I encourage you to give it a try, maybe even tweak it with your favorite flavors or toppings. Once you do, I’m sure this will become a go-to recipe that brings joy and sweetness to all who taste it!
Recipe FAQs
Can I use different cookies instead of Oreos?
Absolutely! While Oreos are classic, you can experiment with chocolate wafer cookies, or even flavored ones like peanut butter cookies, to create unique variations of this dessert.
How long does the cake need to chill?
For best results, allow the Oreo Icebox Cake to chill in the refrigerator for at least 6 to 8 hours, or overnight. This time lets the cookies soften and meld with the creamy layers.
Can I make this cake dairy-free?
Yes! You can substitute the cream cheese and heavy cream with non-dairy alternatives, like cream cheese made from nuts or coconut cream whipped into soft peaks. Just ensure they are suitable for your dietary restrictions.
How can I make the cake more decorative?
You can top the cake with whipped cream rosettes, more crushed Oreos, or even chocolate drizzle for an extra special touch. It’s all about making it visually appealing!
PrintMore Desserts & Appetizers Recipes
- Peach Cobbler | Old-Fashioned Summer Fruit Dessert
- Jalapeno Popper Cucumber Salad
- Strawberry Swirl Marshmallows
- Greek Yogurt Carrot Cake (Easy One Bowl Recipe)
- Cinco de Mayo Street Corn Dip & Guacamole Board
Did You Enjoy Making This Recipe? Please rate this recipe with ⭐⭐⭐⭐⭐ or leave a comment.
📖 Recipe Card
Oreo Icebox Cake
- Prep Time: 15 minutes
- Cook Time: 0 minutes
- Total Time: 15 minutes
- Yield: 9 servings 1x
- Category: Desserts
- Method: No-Bake
- Cuisine: American
Description
This Oreo Icebox Cake is a delightful no-bake dessert that combines creamy whipped filling with chocolatey Oreo layers. Its simple ingredients and preparation make it an ideal treat for any occasion, promising a deliciously sweet experience for dessert lovers.
Ingredients
- 48 oreo cookies
- 4 ounces cream cheese, softened
- 2 ½ cups (595 g) heavy whipping cream, cold
- ½ cup (62.5 g) confectioners' sugar
- 1 teaspoon vanilla extract
- Crushed Oreo cookies
Instructions
- Chill the bowl of a stand mixer and its whisk attachment in the freezer for 15 to 20 minutes.
- Beat the softened cream cheese in the chilled bowl until smooth.
- Add the cold heavy whipping cream, confectioners’ sugar, and vanilla extract, then beat on medium-high speed until stiff peaks form, taking care not to overbeat.
- Spread a thin layer of the whipped cream mixture into the bottom of an 8×8-inch baking dish.
- Arrange a single layer of Oreo cookies over the whipped cream, breaking them as necessary to fit.
- Spread about one-third of the remaining whipped cream mixture evenly over the cookies.
- Repeat the layering two more times, finishing with a final layer of whipped cream on top.
- Sprinkle the top with crushed Oreo cookies.
- Cover tightly and refrigerate for at least 6 to 8 hours, or overnight, allowing the cookies to soften and create a cake-like texture.
- Serve cold, and for clean slices, freeze the cake for 20 to 30 minutes before cutting.
Notes
This cake is best when refrigerated overnight for optimal flavor and texture.
Feel free to customize by adding chocolate or caramel sauces between layers if desired.
Store leftovers covered in the refrigerator for up to 3 days.
Nutrition
- Serving Size: 1 slice
- Calories: 401
- Sugar: 24g
- Sodium: 200mg
- Fat: 31g
- Saturated Fat: 18g
- Unsaturated Fat: 13g
- Trans Fat: 0g
- Carbohydrates: 34g
- Fiber: 1g
- Protein: 4g
- Cholesterol: 70mg